Design Dash Workshop: How to Turn Uncertainty into Innovative Solutions in Just One Day
I once joined a product team struggling to solve a critical user experience problem. For weeks, they'd been going in circles, with endless meetings that produced more confusion than clarity. Stakeholders were growing impatient, designers were frustrated, and the deadline was looming. Everyone had opinions, but no one had a clear path forward.
Contrast this with another team I later worked with facing a similarly complex challenge. Instead of endlessly debating options, they set aside a day for a structured Design Dash workshop. They systematically mapped their user's journey, identified pain points, brainstormed creative solutions, and prioritised actionable next steps. By the end of the day, they had not only aligned on the problem but had developed innovative solutions that excited both the team and stakeholders.
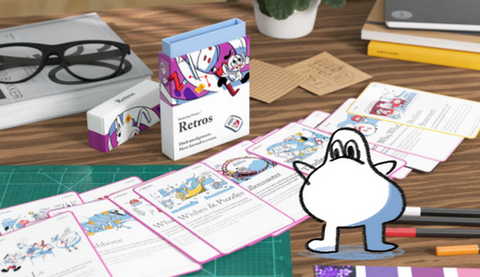
The difference wasn't the team's talent or the complexity of the challenge—it was their approach. In this guide, I'll share three powerful workshop tactics from Workshop Tactics by Pip Decks that will help you transform uncertainty into clear action through a Design Dash workshop.
What We'll Cover in This Guide:
- Identifying opportunities with Journey Map
- Finding unexpected solutions with Reverse Brainstorm
- Prioritising the best ideas with Priority Map
Let's explore these tactics with a real-world example: Pip's Podcast team wants to transform team uncertainty into actionable solutions, prioritising key issues for a superior user experience.
1. Identifying Opportunities with Journey Map

Before you can solve a problem, you need to understand the full experience from your user's perspective. The Journey Map tactic helps you visualise the entire user journey and identify the pain points where improvement is most needed.
⏱️ Time: 1-2 hours
🧠 What's the goal? Map out your user or customer's journey to identify opportunities for improvement.
👀 Why this matters: This tactic identifies new ways to improve a user's experience. By mapping the steps of your service or product, you can start identifying your users' level of frustration or delight at any given stage. Doing this helps you see how the experience can be improved.
💡 Tip: There can be any number of steps between the first interaction point and the final outcome. Don't limit yourself to just the obvious steps—include the emotional and cognitive journey as well.
How to Create a Journey Map:
- Since this is the start of your overall workshop, begin with an icebreaker to warm everyone up.
- Draw the following on a large surface: (10 minutes)
- A sticky note with the first moment the user interacts with your product or service. For example, "clicks on nature podcast homepage."
- A sticky note with the final outcome your user is aiming for. For example, "listened to entire nature podcast."
- Instruct the group to write on sticky notes the steps the user takes before, between, and after these two points. (15 minutes)
- Collect and put all the sticky notes along a dashed line in the correct order they occur. (5 minutes)
- Together, discuss each sticky note and decide its position along the y-axis based on how delightful or frustrating that step is for the user. (20 minutes)
- Write How Might We… questions for the most frustrating or least delightful steps between the start and end points. (10 minutes)
Example from Pip's Podcast:
Pip's Podcast team created a journey map for their listeners, starting from "discovers podcast in app store" to "becomes a regular listener." They plotted each step along the way, including downloading the app, browsing episodes, listening to the first episode, and sharing with friends.
The team identified several pain points:
- Finding relevant episodes was frustrating due to poor categorisation
- Episode descriptions were vague and unhelpful
- The listening experience was interrupted by jarring transitions between segments
These insights led to several "How Might We" questions, including "How might we make episode discovery more intuitive?" and "How might we create smoother transitions between podcast segments?"
2. Finding Unexpected Solutions with Reverse Brainstorm

Traditional brainstorming can sometimes lead to predictable solutions. Reverse Brainstorm flips the process on its head, encouraging participants to think of the worst possible ideas and then reversing them to find innovative solutions.
⏱️ Time: 1 hour
🧠 What's the goal? Think of the worst, most despicable ideas possible, then reverse them to find a solution.
👀 Why this matters: This exercise leads to absurd suggestions, which can give you groundbreaking solutions when reversed. Try asking people for things that would get you all fired if you really want their most abominable ideas.
💡 Tip: Ask yourself if your question allows for a variety of solutions. If it doesn't, broaden it. The more open-ended your question is, the more creative the responses will be.
How to Use Reverse Brainstorm:
- Identify and write down your problem as a "How Might We…" question so that everyone can see. (3 minutes)
- Reverse the problem. For example:
- Problem: How might we increase customer satisfaction?
- Anti-problem: How might we increase customer dissatisfaction?
- Have participants write down ideas for the anti-problem—the worst possible solutions they can think of. (15 minutes)
- Share the anti-ideas, then collect them and randomly distribute them back among the group. (10 minutes)
- Ask the group to reverse the ideas they've been given. These will now become real solutions for the actual problem. For example:
- Anti-solution: Not returning customer calls immediately upon a call request.
- Real solution: Returning customer calls immediately upon a call request.
- Do it again to gather even more ideas, or evaluate what you've got with Rose, Thorn, Bud. (10 minutes)
Example from Pip's Podcast:
The podcast team took one of their "How Might We" questions from the Journey Map: "How might we make episode discovery more intuitive?"
They reversed it to: "How might we make episode discovery as confusing as possible?"
Some of their anti-solutions included:
- Use cryptic, misleading episode titles that don't relate to the content
- Hide categories deep in the navigation menu
- Mix episodes from different series together randomly
- Use technical jargon in all descriptions
When reversed, these led to innovative solutions:
- Create clear, benefit-focused episode titles that accurately preview the content
- Place category filters prominently at the top of the discovery screen
- Create coherent series with clear visual grouping
- Write approachable, jargon-free descriptions focused on listener benefits
3. Prioritising the Best Ideas with Priority Map

With a collection of potential solutions in hand, you need to determine which ones to pursue first. The Priority Map tactic helps teams make these difficult decisions in a structured, collaborative way.
⏱️ Time: 30 minutes – 1 hour
🧠 What's the goal? Prioritise the best ideas by two criteria such as Impact vs Effort or Cost vs Value.
👀 Why this matters: This tactic allows you to pinpoint the criteria that matter the most to your group. Find the magic combination between seemingly competing demands. This tactic encourages a debate about what is more important in any given context. Ruthless prioritisation is the secret super-power behind effective teams.
💡 Tip: The value of this exercise is not in the absolute rankings you obtain, but in the discussion your participants will have around it. Make sure you not only capture the ranking, but also the arguments used in the discussion as well.
How to Use Priority Map:
- Prior to this tactic, have a list of items such as ideas from your Reverse Brainstorm session. (These should be prepared beforehand)
- Draw two axes on a large surface. Pick two criteria your participants find important. (5 minutes)
Here are some commonly used examples:
- Impact vs. Effort
- Risk vs. Knowledge
- Urgency vs. Importance
- Business Needs vs. User Needs
- Feasibility vs. User Value
- Cost vs. Problem
- Plot your items (usually sticky notes) on the map by ranking them against the criteria. It can help to ask "is this more or less than this one?" to get a sense of relativity between items. (20 minutes)
Example from Pip's Podcast:
The podcast team chose "Impact vs. Effort" as their axes for the Priority Map. They placed each of their potential solutions on the map and had rich discussions about where each item belonged.
The solutions that landed in the "High Impact, Low Effort" quadrant included:
- Redesigning the episode card templates to include clearer categorisation
- Creating a standardised format for episode titles that includes the main benefit
- Implementing a simple tagging system for listeners to find related content
These became their top priorities for immediate implementation, while more complex solutions were scheduled for later development phases.
But What If We Don't Have Time for All This?
Some teams might resist dedicating a full day to a Design Dash, arguing that they're too busy "doing the actual work." But consider this: How much time is your team currently spending on circular discussions, reworking solutions that miss the mark, or implementing features that don't address the real user needs?
A well-facilitated Design Dash typically takes 4-6 hours, but can save weeks or even months of misdirected effort. One product manager I worked with estimated that their team saved two full development sprints by taking the time to run a proper Design Dash before diving into implementation.
As one design director put it: "We thought we couldn't afford to take a day for a workshop. What we learned was that we couldn't afford not to."
Ways to Use This Recipe
- Over multiple days: three short sessions, about 1 hour each.
- Half-day experience: two sessions for about two hours each, with a longer break in the middle.
What You Need Before You Start
In person
- Preparation (book room, invite people, write and share agenda)
- Materials (whiteboard, sticky notes, pens)
- Tech check (charger, adapter, screen projector)
- Room (refreshments, temperature, chairs, wall space)
Hybrid
- Preparation (book room, send call link, invite people, write and share agenda)
- Materials (whiteboard, sticky notes, pens, Miro board)
- Tech check (charger, adapter, screen projector)
- Room (refreshments, temperature, chairs, wall space)
Online
- Preparation (invite people, write and share agenda, create and send call invite)
- Materials (Miro board)
- Tech check (charger, adapter, Microphone/headphones)
Real-World Success: From Confusion to Clarity
A fintech company I worked with was struggling to redesign their onboarding flow. User drop-off was high, and the team had been debating different approaches for weeks without making progress.
We ran a Design Dash workshop using these three tactics. The Journey Map revealed that users were particularly frustrated during identity verification steps. Through Reverse Brainstorm, the team generated creative solutions they hadn't previously considered, including a progressive verification approach that reduced initial friction. Finally, the Priority Map helped them identify which solutions would deliver the most impact with reasonable effort.
The results were dramatic: after implementing the changes, user drop-off during onboarding decreased by 42%, and time-to-first-transaction improved by 30%. What's more, the team reported that the workshop helped them break through their analysis paralysis and gave them a structured way to approach similar challenges in the future.
Common Mistakes to Avoid
Even with these powerful tactics, there are pitfalls to watch for:
- Skipping the research: Journey Maps are most effective when based on actual user research, not just team assumptions. If possible, do some user interviews or usability testing before your Design Dash.
- Getting too attached to ideas: The goal is to find the best solutions for users, not to implement any particular person's idea. Use the Priority Map to objectively evaluate options.
- Forgetting about technical feasibility: Involve developers or technical team members in your Design Dash to ensure the solutions you prioritise are technically viable.
- Not having clear next steps: End your Design Dash by assigning owners and timelines to the prioritised solutions.
Putting It All Together
These three workshop tactics from Pip Decks' Workshop Tactics form a powerful sequence for a Design Dash workshop:
- Journey Map helps you understand user pain points and identify opportunities for improvement
- Reverse Brainstorm generates creative, unexpected solutions to those pain points
- Priority Map helps you decide which solutions to pursue first
Together, they transform uncertainty into clarity, disagreement into alignment, and ideas into action. They replace endless debates with structured discussions and subjective opinions with collaborative decision-making.
Remember the team I mentioned at the beginning? The one going in circles with endless meetings? They eventually ran a Design Dash using these tactics, and within a single day, they had not only aligned on the problem but had developed a prioritised roadmap for addressing it. Three months later, they delivered a solution that delighted users and stakeholders alike.
Your team deserves the same clarity and momentum. Whether you're designing a new product feature, improving a service experience, or tackling a complex user problem, these tactics will help you transform uncertainty into actionable solutions.
Ready to Transform Your Design Process?
Start implementing these tactics in your next design challenge and experience the difference a structured approach makes in your team's ability to solve complex problems.
Introducing Workshop Tactics by Pip Decks
These three Design Dash tactics are just a small sample of the powerful facilitation tools available in the full Workshop Tactics deck by Pip Decks. With 54 carefully designed workshop recipe cards, you'll confidently lead teams through any collaborative challenge.
Workshop Tactics helps you:
- Run effective workshops that produce real outcomes
- Put an end to pointless, unproductive meetings
- Give your team clarity on complex problems
- Uncover hidden skills within your organisation
- Generate truly innovative, out-of-the-box ideas
As one product design leader put it: "Workshop Tactics transformed how our teams collaborate. Instead of endless debates, we now have structured conversations that lead to actual decisions."
Based on the Design Dash recipe from Workshop Tactics
"I designed this recipe to help teams break through design challenges with a structured, collaborative approach."
– Charles Burdett, Founder of Pip Decks


